
Build scalable, serverless chat with Vue and ChatEngine.io
Are you looking to build a chat application that can handle a large number of users without breaking the bank? In this blog post, we will explore how to use Vue, Vite.js, and ChatEngine.io to create a scalable, serverless chat application.
- Vue is a popular JavaScript framework for building interactive user interfaces
- Vite.js is a tool that allows you to build and serve Vue applications with lightning-fast speed
- ChatEngine.io is a powerful chat API that makes it easy to add chat functionality to your application.
We’ll walk through the steps of setting up your development environment, creating the chat interface, and connecting it to ChatEngine.io. By the end of this tutorial, you’ll have a fully-functional chat application that can handle +100k users.
So, let’s get started! Check the demo app below 👍
1. Setting up Vite.js and Vue
First, let’s setup a project (I’ll call mine serverless-chat) by installing Vite.js and running it.
npm create vite@latest
# Follow the steps inline
cd serverless-chat
npm install
Make sure you selected Vue and JS (not TS). Now let’s install a few more dependencies before writing app code.
npm install axios react-chat-engine-pretty veauryaxiosallows us to send HTTP requests to other servers (needed for Chat Engine API calls)react-chat-engine-prettywill be our out-of-the-box chat UIveaurymakes our React.js component compatible with Vue needed forreact-chat-engine-pretty)
Our last step, let’s create all the files we need to start coding. Run the following commands:
# From serverless-chat
rm -rf src/components
mkdir src/pages
mkdir src/pages/AuthPage
touch src/pages/AuthPage/index.vue
touch src/pages/AuthPage/apis.js
mkdir src/pages/ChatsPage
touch src/pages/ChatsPage/index.js
Once complete, the src folder within your project should look like the following:
src/
├── App.vue
├── assets
├── main.js
├── pages
│   ├── AuthPage
│   │   ├── api.js
│   │   └── index.vue
│   └── ChatsPage
│       └── index.vue
└── style.css
Let me explain what these files are for:
AuthPagewill be our UI for login and sign-upsChatsPagewill be our UI for chatting with other users
Now that our project is set up - let’s code these two pages and connect it to ChatEngine.io
2. Creating the Auth Page
First, let’s make our main App.vue file render the AuthPage if there currently is NO user.
Add the following code to src/App.vue:
<script setup>
import AuthPage from "./pages/AuthPage/index.vue";
import ChatsPage from "./pages/ChatsPage/index.vue";
</script>

<template>
  <AuthPage v-if="!user" @onAuth="handleAuth" />
  <ChatsPage
    v-else
    v-bind:username="user.username"
    v-bind:secret="user.secret"
  />
</template>

<script>
export default {
  data() {
    return {
      user: undefined,
    };
  },
  methods: {
    handleAuth(user) {
      this.user = user;
    },
  },
};
</script>
Now, our root component App.vue will render AuthPage is there is no user, will set the user state object with a handleAuth callback, and render ChatsPage when the user exists.
Now let’s create an Auth Page which looks like the image below.
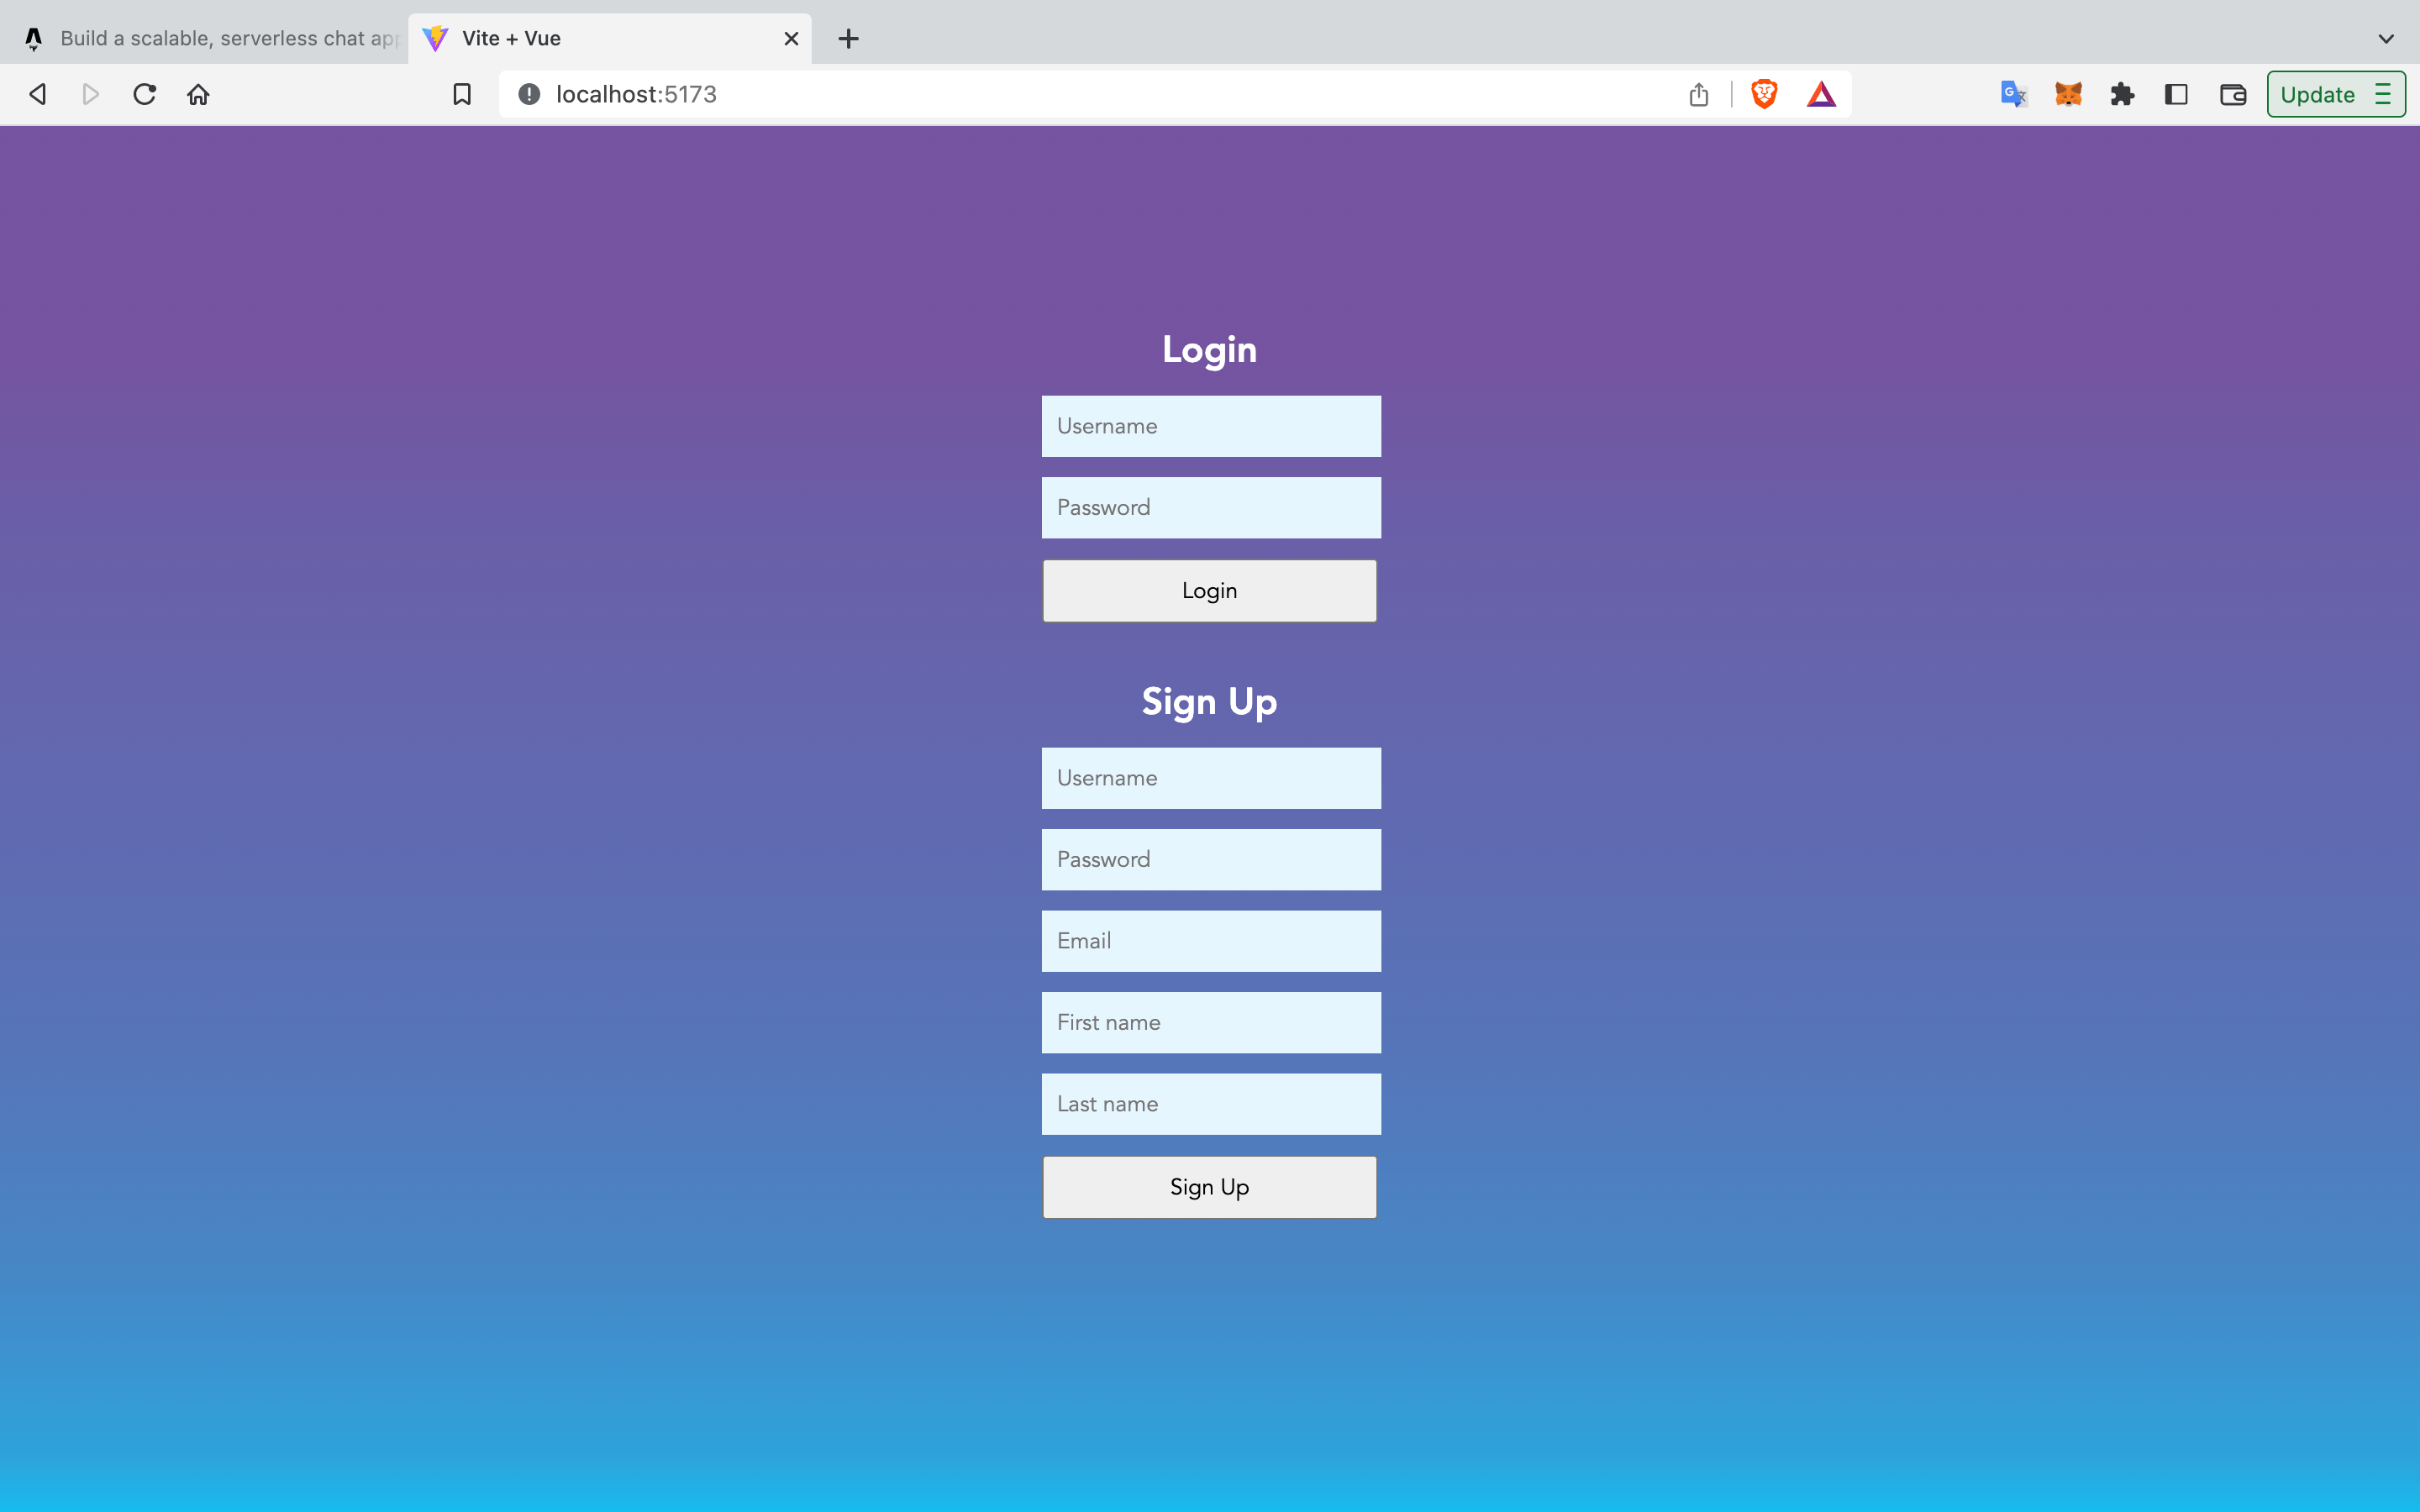
To do so, add the following code to src/pages/AuthPage/index.vue:
<template>
  <div class="login-page">
    <div class="card">
      <form @submit.prevent="login">
        <div class="title">Login</div>
        <input placeholder="Username" type="text" v-model="username" />
        <br />
        <input placeholder="Password" type="password" v-model="password" />
        <br />
        <button type="submit">Login</button>
      </form>

      <form @submit.prevent="signup">
        <div class="title">Sign Up</div>
        <input
          class="input"
          placeholder="Username"
          type="text"
          v-model="username"
        />
        <br />
        <input placeholder="Password" type="password" v-model="password" />
        <br />
        <input placeholder="Email" type="text" v-model="email" />
        <br />
        <input placeholder="First name" type="text" v-model="first_name" />
        <br />
        <input placeholder="Last name" type="text" v-model="last_name" />
        <br />
        <button type="submit">Sign Up</button>
      </form>
    </div>
  </div>
</template>

<script>
// import { loginRest, signupRest } from "./api";

export default {
  data() {
    return {
      username: "",
      password: "",
      email: "",
      first_name: "",
      last_name: "",
    };
  },
  methods: {
    login() {
      // loginRest(this.username, this.password)
      //   .then((response) =>
      //     this.$emit("onAuth", { ...response.data, secret: this.password })
      //   )
      //   .catch((error) => console.log("Login error", error));
    },
    signup() {
      // signupRest(
      //   this.username,
      //   this.password,
      //   this.email,
      //   this.first_name,
      //   this.last_name
      // )
      //   .then((response) =>
      //     this.$emit("onAuth", { ...response.data, secret: this.password })
      //   )
      //   .catch((error) => console.log("Sign up error", error));
    },
  },
};
</script>
Also add an empty <template> tag in ChatsPage/index.vue:
<template></template>Finally, add the following CSS code to src/style.css
* {
  font-family: Avenir;
}
body {
  margin: 0px;
}
.login-page {
  width: 100vw;
  height: 100vh;
  background: linear-gradient(
    180deg,
    rgba(117, 84, 160, 1) 7%,
    rgba(117, 84, 160, 1) 17%,
    rgba(106, 95, 168, 1) 29%,
    rgba(99, 103, 174, 1) 44%,
    rgba(87, 116, 184, 1) 66%,
    rgba(70, 135, 198, 1) 83%,
    rgba(44, 163, 219, 1) 96%,
    rgba(22, 188, 237, 1) 100%,
    rgba(0, 212, 255, 1) 100%
  );
}
.card {
  width: 200px;
  position: relative;
  left: calc(50vw - 100px);
  text-align: center;
  padding-top: 6vw;
}
.title {
  padding-top: 32px;
  font-size: 22px;
  color: white;
  font-weight: 700;
}
input {
  width: calc(100% - 16px);
  margin-top: 12px;
  padding: 8px;
  background-color: #e6f7ff;
  outline: none;
  border: 1px solid #e6f7ff;
}
button {
  margin-top: 12px;
  width: 100%;
  padding: 8px;
}
You can now run this app with the following command: npm run dev
This vue component is a basic login + signup form. When each form is completed, they call Chat Engine’s login existing user API and signup new user API, respectively.
But wait… what is Chat Engine and why do we need it?
Let me explain that and how we can connect our app to Chat Engine’s API.
3. Connecting auth to ChatEngine.io
ChatEngine.io is a chat API that allows you to easily add chat functionality to your application. It is a powerful tool that provides a simple, flexible, and scalable way to build chat into any application.
To get started, signup at https://chatengine.io and create a “New Project”.
In ChatEngine.io, a project is a container for your chat functionality. Each project is associated with a unique API key, which you can use to access the chat functionality provided by the ChatEngine.io API.
Copy your project’s “Project ID” and “Private Key”. Your Project ID links API calls to your project, and the Private Key allows you to create and destroy users within your project.
Now, add the following code to src/pages/AuthPage/api.js:
import axios from "axios";

const loginRest = async (username, secret) => {
  return await axios.get("https://api.chatengine.io/users/me/", {
    headers: {
      "Project-ID": import.meta.env.VITE_CHAT_ENGINE_PROJECT_ID,
      "User-Name": username,
      "User-Secret": secret,
    },
  });
};

const signupRest = async (username, secret, email, first_name, last_name) => {
  return await axios.post(
    "https://api.chatengine.io/users/",
    { username, secret, email, first_name, last_name },
    { headers: { "Private-Key": import.meta.env.VITE_CHAT_ENGINE_PRIVATE_KEY } }
  );
};

export { loginRest, signupRest };loginRest()will see if a user (with this username / secret combo) exists in your projectsignupRest()will create a new user on your project with the specified attributes
Be also to create a .env.local file at the top level with your own values:
VITE_CHAT_ENGINE_PROJECT_ID=XXXXXXXX-XXXX-XXXX-XXXX-XXXXXXXXXXXX
VITE_CHAT_ENGINE_PRIVATE_KEY=YYYYYYYY-YYYY-YYYY-YYYY-YYYYYYYYYYYY
We’ve completed the Auth Page and you should see the following:
- When you complete the “Sign Up” form, the user data is sent to chat engine and a new User is created on your project.
- When you complete the “Login” form, the user data is sent to chat engine and an existing User is fetched - if they exist.
However, out Chats Page is empty. So let’s implement that!
3. Creating the Chats Page
Finally, to complete our ChatsPage, we’ll use react-chat-engine-pretty.
react-chat-engine-pretty is a library that allows you to easily add chat functionality to your React application using ChatEngine.io. It provides a simple way to build chat into your frontend app, and is designed to work seamlessly with the ChatEngine.io API.
(There are also other UI options like react-chat-engine and react-chat-engine-advanced)
With that in mind, let’s add the following code to src/pages/ChatsPage/index.vue
<template>
  <div style="height: 100vh">
    <PrettyChatWindow
      :projectId="projectId"
      :username="username"
      :secret="secret"
    />
  </div>
</template>

<style>
.ce-new-chat-button {
  width: 32px;
  position: relative;
  bottom: 22px;
}
</style>

<script>
import { PrettyChatWindow } from "react-chat-engine-pretty";
import { applyReactInVue } from "veaury";

export default {
  data() {
    return {
      projectId: import.meta.env.VITE_CHAT_ENGINE_PROJECT_ID,
    };
  },
  components: {
    PrettyChatWindow: applyReactInVue(PrettyChatWindow),
  },
  props: {
    username: {
      type: String,
      required: true,
    },
    secret: {
      type: String,
      required: true,
    },
  },
};
</script>
This code loads the react-chat-engine-pretty UI PrettyChatWindow and makes it Vue compatible with applyReactInVue.
Assuming our Project ID, username and secret props are valid then this UI should automatically connect our authenticated user into Chat Engine’s platform.
Run the react app with npm run dev
Done 🎉
You’re chat app is fully functional now! Please email adam@lamorre.co with any questions or post in Chat Engine’s stackoverflow.
Hope you enjoyed!